Mac support
Omarchy has built-in support for Intel Macs. There are a couple of known limitations at the moment, but as long as you’re aware and OK with those; you can breathe some new life into your old Macs by loading Omarchy.
Please note that installing on an M-series Mac is not directly supported at this time. You can find out more about the state of this in #omarchy-on-other in our Discord.
In a simple test, we were able to achieve 36% performance gains on a 2019 MacBook Pro just by installing Omarchy.
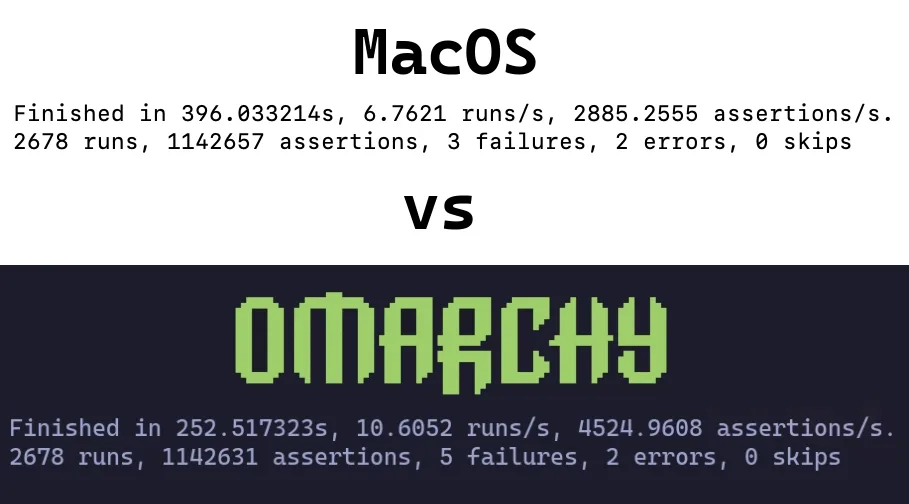
Installing Omarchy on Mac
Omarchy only supports being the only OS installed at the moment. During the installation, the drive will be wiped and MacOS will no longer be bootable.
You can still restore it later via Internet Recovery if you’d like.
For the sake of this part, we’ll assume you’ve already reviewed Getting Started and have your USB drive ready. If you don’t go ahead and do that now.
Disable Secure Boot #
It is necessary to disable Apple’s Secure Boot in order to boot the bootable USB, as well as the OS. To disable it, perform the following:
- Turn off your Mac
- Turn it on and immediately press and hold Command-R until you see the loading screen appear
- Select your user and enter your password if prompted
- Once in the recovery screen, choose Utilities > Startup Security Utility from the menubar
- Enter your password when prompted to authenticate
- Choose “No Security” from the Secure Boot options
- Choose “Allow booting from external or removable media” from the External Boot options
Start the Installation #
- Insert the USB drive
- Restart your Mac and immediately press and hold Option until you see a screen of boot devices
- Select the orange EFI Boot device
- Proceed with the install as normal
The installer detects Mac hardware and applies the needed fixes automatically: Broadcom Wi-Fi drivers and firmware, the SPI keyboard driver on the MacBook models that need it, and an NVMe suspend fix for those same models.
Known Limitations
Members of the community are constantly working on solutions to these challenges so if these are problematic for you, join #omarchy-on-other in our Discord and see if there’s any up-to-date methods for resolving these.
Devices with T1 Chip #
The Apple T1 chip was introduced in late 2016 and used exclusively in the first-generation MacBook Pro models with Touch Bar.
- MacBook Pro 13-inch (2016, two Thunderbolt 3 ports) – Model: A1706
- MacBook Pro 13-inch (2016, four Thunderbolt 3 ports) – Model: A1708
- MacBook Pro 15-inch (2016) – Model: A1707
Known Issues #
- Touch Bar is non-functional
- Sound is not functioning
Devices with T2 Chip #
The Apple T2 Security Chip was introduced in 2017. The T2 chip was discontinued with the transition to Apple silicon (M-series chips) starting in 2020.
- iMac Pro (2017) – Model: A1862
- MacBook Pro 13-inch (2018, four Thunderbolt 3 ports) – Model: A1989
- MacBook Pro 15-inch (2018) – Model: A1990
- MacBook Air (Retina, 13-inch, 2018) – Model: A1932
- Mac mini (2018) – Model: A1998
- MacBook Pro 13-inch (2019, two Thunderbolt 3 ports) – Model: A2159
- MacBook Pro 13-inch (2019, four Thunderbolt 3 ports) – Model: A2178
- MacBook Pro 15-inch (2019) – Model: A1990
- MacBook Pro 13-inch (2020, two Thunderbolt 3 ports) – Model: A2265
- MacBook Pro 15-inch (2020) – Model: A1990
On these models, the installer automatically sets up the patched linux-t2 kernel, the T2 audio configuration, Apple’s Broadcom Wi-Fi/Bluetooth firmware, and fan control via t2fanrd. The Touch Bar runs on the kernel’s built-in Boot Camp-style support.